In this part of out mini-tutorial series about physics in GameMaker Studio 2, we are going to explore joints, advanced physics world functions, and debug drawing. If you haven't already read through the previous parts of this series, you can find them from the links given at the top of the page.
These previous tech blogs are not essential for completing this one, but if you haven't used physics before in GameMaker Studio 2 then it is highly recommended that you give them a read through before continuing.
SET UP THE PHYSICS WORLD
in this article, we are going to start from scratch so create a new GML project and call it "Physics Joints" or something similar. Now, open the room editor for "Room0", and set the background layer colour to dark grey (you'll see why later), then close the room editor. We aren't going to use the physics tab in the editor to set up the physics world (like we did in the previous tech blogs), but instead we are going to do it in code.
Create a new object now and call it obj_Control then give it a Create Event with the following code:
physics_world_create(0.1);                      //Pixel to meters scale
physics_world_gravity(0, 0);                    //No gravity
physics_world_update_iterations(20);            //iterations per step
physics_world_update_speed(60);                 //Update speed
The first two lines are the same as the option in the Room Editor for setting the pixels-to-meters scale and the gravity vector (which in this case we set to 0 to make things simpler), but the last two are slightly more complex and don't appear in the Room Editor.
The first deals with the update iterations of the physics systems. This value is the number of times that the physics will iterate through the collisions and movement etc... per game step. So, here we are stating that the physics simulation should iterate through everything 20 times a step. This is a very powerful function as it means that you can make the simulation more or less precise by setting this to a higher or lower value.
The second is the update speed. This is the number of update steps per second that the physics simulation will run. Normally this value defaults to the room speed, but you can set it to a higher or lower value to increase or decrease precision. For example, a room speed of thirty and an update of 60 will force the physics simulation to run an update twice for every game step. Note that this is independant of the iteration speed, and will be cumulative with it, ie. an iteration speed of 20 and an update speed of 60 in a 30fps room will give 40 iterations per step.
In general you won't want to use these functions (and they are only here to show you how they are used, but they aren't strictly necessary for this demo), but if you have a game that requires very fast movement then you may want to up the iterations, or if you have a game that has a lot of physics bodies but that doesn't require such precision, you could lower the update speed and reduce the CPU load.
Our next task is to "box in" the room, so that we can bounce fixtures around without them leaving, so after the world code, add this:
var edge_fix = physics_fixture_create();
physics_fixture_set_chain_shape(edge_fix, true);
physics_fixture_add_point(edge_fix, 0, 0);
physics_fixture_add_point(edge_fix, room_width, 0);
physics_fixture_add_point(edge_fix, room_width, room_height);
physics_fixture_add_point(edge_fix, 0, room_height);
physics_fixture_set_density(edge_fix, 0);
physics_fixture_set_restitution(edge_fix, 0.5);
physics_fixture_bind(edge_fix, id);
physics_fixture_delete(edge_fix);
If you've followed the other tech blogs so far, you should recognise this code as being similar to that which we used for defining a polygon fixture. The difference this time is that we are using it to create a static chain fixture, which is special fixture made from a number of connecting edge fixtures, and we construct like we would a polygon fixture by giving a series of points, although chains can be any length and do not have the same limitations that polygons do.
Go ahead and place this object in the room now at the (0,0) position (if you place it elsewhere then it will not correctly bound the room).
USING DEBUG MODE
Another thing we are going to use in this example is the physics debug mode. You can call the function physics_world_draw_debug() in a Draw Event to force GameMaker Studio 2 to draw a number of different physics related values, like the fixture shape, the rotation angles, joints, etc... which is incredibly useful as a debug tool when creating physics enabled games as you can see what's happening "behind the scenes". However, we'll be using the function in this demo as a method of drawing the fixtures rather than having to give everything sprites (technically, you could code a whole game with no sprites and draw it using this function! However, it won't be pretty...).
This function takes a single value which is a bit mask. Different things can be rendered by setting the appropriate flag to mask or un-mask them, so we need to set that value in the Create Event of out controller object too. Don't worry if you're unfamiliar with bit-masking, as we'll be covering it in more detail in the final part of this tech blog series. For now just use the following code in the controller object, after what we've previously added:
render_flags = phy_debug_render_shapes | phy_debug_render_joints | phy_debug_render_coms | phy_debug_render_obb;
With those flags set, we need to draw the physics so now add a Draw Event with this code:
physics_world_draw_debug(render_flags);
Now when we add instances with fixtures to our room, they will be drawn using this function.
CREATING INSTANCES
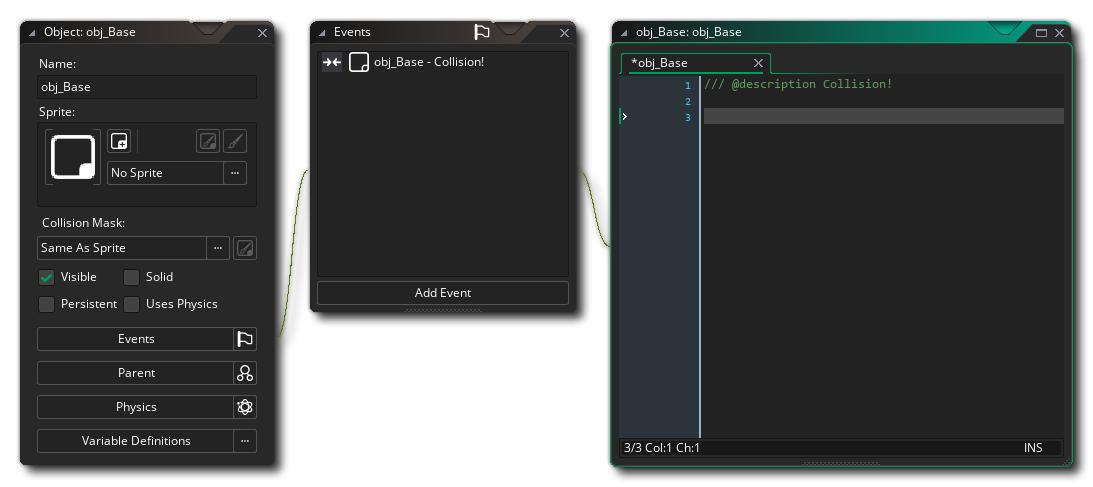
We are almost ready to start adding instances with fixtures to our room, but before we do, we need to make a "base" object. We are going to create all instances and fixtures using code, but we need an object to create an instance of to bind the fixtures to, so make a new object now and call it obj_Base. You will need to add a Collision Event with itself containing a single comment to ensure that collisions will happen:

We can now go back to our controller object and assign the base object as its parent, so that the collision event is inherited and the instances will collide with the chain fixture we boxed the room in with.
Still in the controller object, open the Create Event again. We need to create two instances of our base object and bind a fixture to each of them before we can create a joint that will join them together, so we do that by adding the following code:
var instA = instance_create_layer(100, 100, layer, obj_Base);
var instB = instance_create_layer(100, 300, layer, obj_Base);
var fixA = physics_fixture_create();
physics_fixture_set_circle_shape(fixA, 20);
physics_fixture_set_density(fixA, 0.5);
physics_fixture_set_restitution(fixA, 0.8);
physics_fixture_bind(fixA, instA);
physics_fixture_bind(fixA, instB);
physics_fixture_delete(fixA);
NOTE: Here we create ONE fixture but bind it to TWO instances. This is an example of how fixtures can be re-used multiple times, something we discussed as possible in previous tech blogs.
We also need to add a Global Mouse Left Pressed Event to create an impulse and so move the instances, otherwise you won't be able to see how the joints work once we've added them, so add that event now to the controller with this code:
with (obj_Base)
{
var dist = point_distance(x, y, mouse_x, mouse_y);
if dist < 100
    {
    var pd = point_direction(x, y, mouse_x, mouse_y) - 180;
    physics_apply_impulse(mouse_x, mouse_y, lengthdir_x(100, pd), lengthdir_y(100, pd));
    }
}
With that done, you can run the test project and you should see two "balls" in the room that - if you click near them - you can make bounce around.
ADDING A DISTANCE JOINT
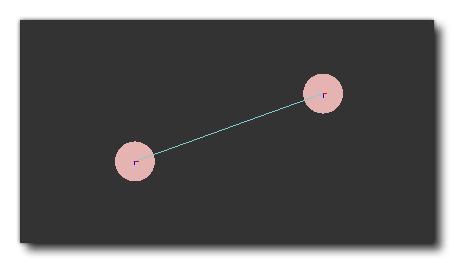
Let's connect those two circle fixture "balls" with a joint. Joints are defined in world space (room space) and not local space like fixtures, so you need to create the instances you want to join and then place the joints based on their room coordinates. In this case - in the obj_Control Create Event, after the code where we created the instances and defined their fixtures - we would do it using a distance joint like this:
physics_joint_distance_create(instA, instB, instA.x, instA.y, instB.x, instB.y, true);
You supply the IDs of the two instances to join, where in the room to join them, and then whether they can collide between themselves or not. All pretty straightforward! Run the room again now and see how you have a "barbell" like fixture that bounces around the room.

NOTE: You can only see the joints when debug drawing! In a normal game they are not visible, therefore you will need to draw some graphics yourself if you want to show a joint between instances on-screen.
ADDING A REVOLUTE JOINT
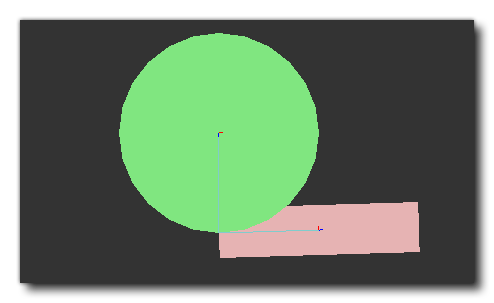
Now you've seen how easy it is to join to fixtures, let's add a couple more but with a different type of joint... a revolute joint. This is a joint that is created at a position in the room and that joins instances around that point. Think of a drawing pin going through two circles of card. you can then rotate the two circles around the pin. Well, our revolute joint is going to do the same thing.
Again, in the obj_Control Create Event, add the following:
var instA = instance_create_layer(room_width - 300, 200, layer, obj_Base);
var instB = instance_create_layer(room_width - 300, 400, layer, obj_Base);
var fixA = physics_fixture_create();
var fixB = physics_fixture_create();
physics_fixture_set_circle_shape(fixA, 100);
physics_fixture_set_density(fixA, 0);
physics_fixture_bind(fixA, instA);
physics_fixture_set_box_shape(fixB, 25, 100);
physics_fixture_set_density(fixB, 0.5);
physics_fixture_bind(fixB, instB);
physics_fixture_delete(fixA);
physics_fixture_delete(fixB);

physics_joint_revolute_create(instA, instB, room_width - 300, 300, 0, 0, false, 100, 50, true, false);
As before, we create two fixtures (a circle and a box) and we want to join the box to the outer edge of the circle. We do this with the revolute joint, and we also give the joint a motor (this is part of the function) so that it rotates. Note that we switch off collisions between the two instances we are joining so that they ignore the collision event if they collide with each other. This is not essential to do and will depend on the type of simulation you want to create for your project, but in this example, we don't want collisions.

Most joints have a few extra parameters to them other than position in space and instances to join - like with the revolute joint you have options that permit you to limit the angle of rotation or add a motor - so make sure to read the manual for each joint function you use to be clear on what each argument does.
ADDING A PULLEY JOINT
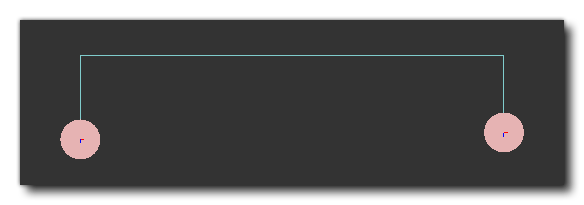
The last joint we are going to add is a pulley joint. This will connect two instances to two positions in the world space, but permit them to move around within the constraints of the pulley, ie: if one moves to the right, then it will "pull" on the pulley joint and cause the other instance to move too. This one may seem a bit complicated, but as you'll see, it's similar to the previous joints.
We'll need to add the following code into the Create Event of our controller:
var instA = instance_create_layer(300, room_height - 100, layer, obj_Base);
var instB = instance_create_layer(room_width - 300, room_height - 100, layer, obj_Base);
var fixA = physics_fixture_create();
physics_fixture_set_circle_shape(fixA, 20);
physics_fixture_set_density(fixA, 0.5);
physics_fixture_set_restitution(fixA, 0.8);
physics_fixture_bind(fixA, instA);
physics_fixture_bind(fixA, instB);
physics_fixture_delete(fixA);

physics_joint_pulley_create(instA, instB, 300, room_height - 180, room_width - 300, room_height - 180, 0, -2, 0, -2, 1, false);
Again, we create two instances, each with fixtures and positioned in the room. We then add the pulley joint by selecting the fixtures, then setting the first and second anchor points for the pulley. These anchor points can be anywhere in the room, and the distance between the instance and each anchor point is the amount of "give" that each end of the pulley will have. You can also set a "local" x and y offset for the joint, and this will make the connection between the pulley and the anchor offset from the base fixture. Finally you can add a ratio (in this case 1:1), which will make one end of the pulley have a larger or smaller length ratio compared to the other end of the pulley.

SUMMARY
This part of our physics tech blogs has hopefully introduced you to the one of the most important pieces of the physics game-making puzzle, joints. We hope it's given you some insight into how they work and, along with the techniques shown for debugging, you should now be able to make some simple physics games, and have a firm base for creating more complex games with a little help from the manual!
You can download an example file with the code in this tutorial from this link.
